


Tutorial Resources
Step 1
Create a new document 1289×1000 px and fill the background with #adadad color. Unzip “Metal Package 5″ and open file “metal5_1181″. Press Ctrl + A to select all then Ctrl + C to copy. Paste it into our newly created document (Ctrl + V) and desaturate (Ctrl+ Shift + U). Lower the opacity of the texture layer to 24% and change the blend mode to Overlay.

Step 2
Duplicate the texture layer and change it’s blend mode to normal. Free transform this layer to create the floor and using the Eraser tool or the layer mask blend it seamlessly with the background. If the texture seems blurry sharpen it using the Unsharp Mask filter.

Step 3
Make a new layer (Ctrl + Alt + Shift + N) and lower the opacity to 11%. With a soft black round brush paint the outer edges to make the floor stand out better. Make another new layer and with a soft white round brush at 700px size dab once in the middle. We will place our shoe over the light to make it the point of interest in our scene.
Step 4
Open file “Shoe” and using your favorite selection tool copy and paste the shoe into our document. Place it in the middle of the scene.
Step 5
Unzip the “Paint Tossing Pack” and open file 15. Using the Magic Wand tool click once on the background to select it an then inverse the selection (Ctrl + Shift + I) to select the splash. Copy and paste this into our document. Position this splash as shown below and use the Eraser tool or add a layer mask and blend it seamlessly with the shoe.
Step 6
Add a clipped Gradient Map adjustment layer and Curves adjustment layer to darken the splash.

![image010[1]](http://photoshoptutorials.ws/images/stories/8f87eb5b68b9_D855/image0101.png "image010[1]")
Step 7
Repeat the instructions from step 5 but this time use file “9″.
Step 8
Add a clipped Gradient Map adjustment layer and use the settings shown below. After that add a Curves adjustment layer to slightly darken the splash.

Step 9
Repeat the instructions from step 5 with file “14″.
Step 10
Add a clipped Gradient Map adjustment layer with the settings shown below and a clipped Curves adjustment layer to darken this splash.

Step 11
Repeat the instructions from step 5 with file “7″.
Step 12
Add a clipped Gradient Map adjustment layer and a Curves adjustment layer to darken the splash.

Step 13
Make a new layer and move it below the “Sneakers” layer and change it’s blend mode to Multiply. With a round soft black brush pain some shadow. Try to image how the shadow would be below the sneaker. Lower the opacity of the layer if necessary.
Step 14
We want to keep it simple so we will add just a couple of adjustment layers to increase the contrast. First add Gradient Map adjustment layer with black and white as default colors and change it’s blend mode to Overlay. Lower the opacity of this layer to 74%.
Step 15
For some further contrast add Black &White adjustment layer rand change the blend mode to overlay. Lower the opacity to 50%.
Step 16
As a final step let’s add some text to make it look classier. I used Bebas Neue font.
Final Results
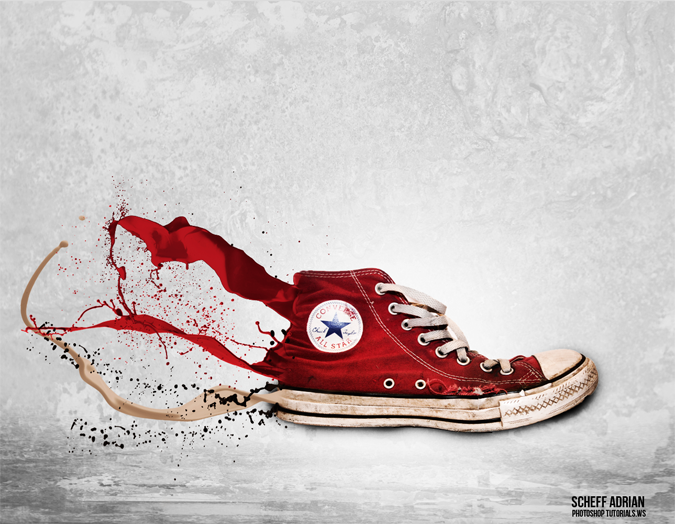
Thanks for following my tutorial and I hope you learned something useful from it. You can see some of my other art deviations here . Have fun Photoshopping!! - Adrian Scheff


1 Comments:
thanks my allah and my teacher this website , i can,t pay you any thing to say thanks very very very very very my teacher .
Post a Comment