


 Tutorial Assets
The following assets were used during the production of this tutorial.Introduction
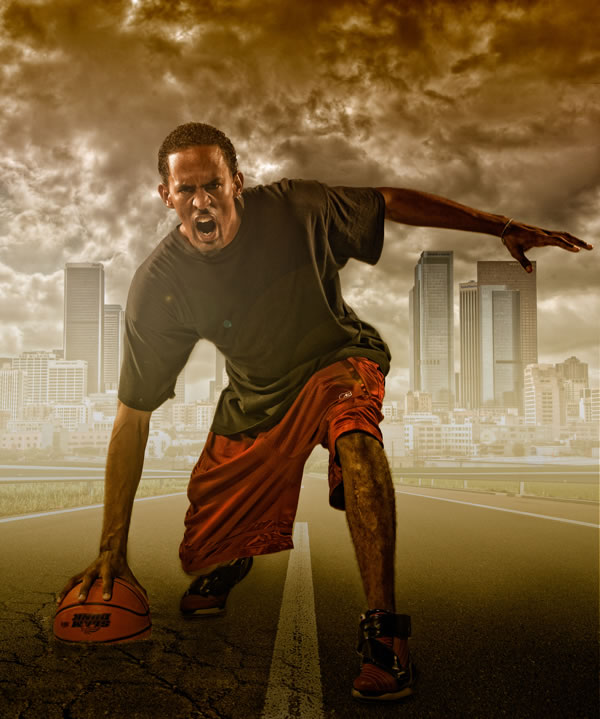
This is probably one of the hottest compositing trends today. A lot of photographers are now choosing to photograph athletes in a studio and then composite them into a background that’s more fitting to their sport, or simply more dramatic. Whether it’s for an advertisement (Nike and Under Armour do it all the time), or whether the athlete just wants a great photo of themselves, shooting this way offers a ton of opportunities. Plus, it makes things a lot easier if you don’t have access to some of the cool locations that you’d ideally like to shoot in.
Prepping the Background
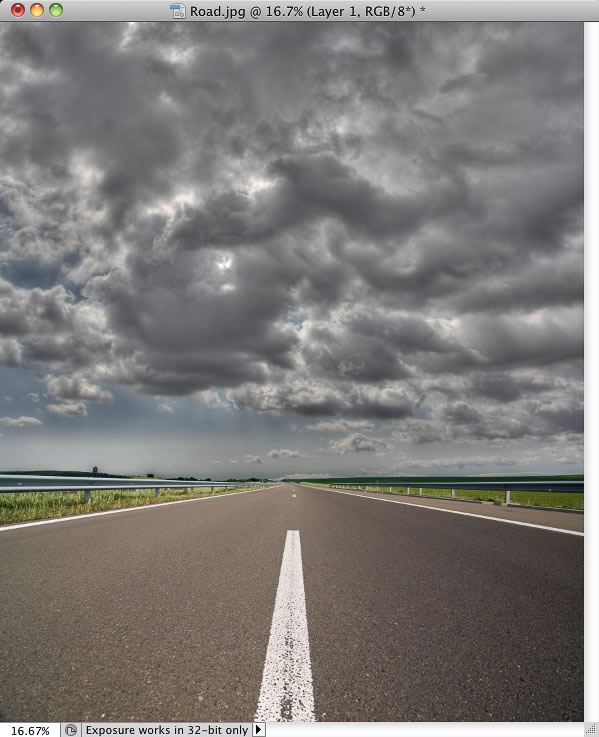
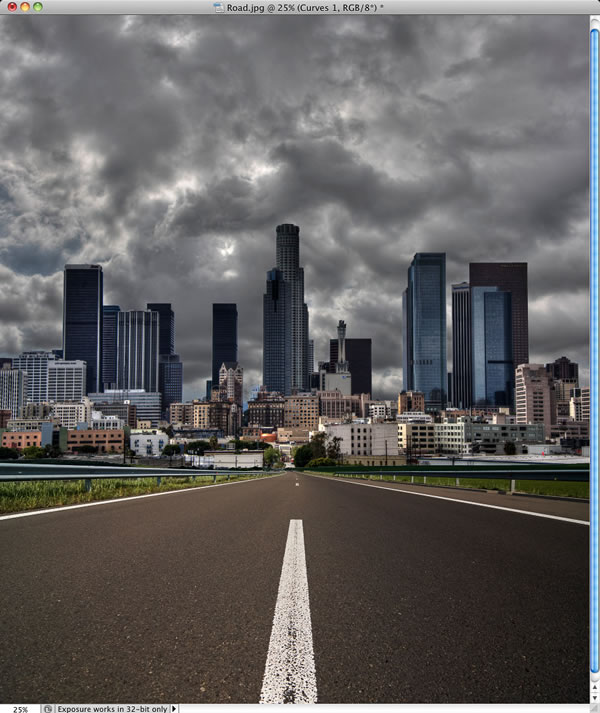
As always, our background is almost just as important as the portrait itself. After all, we’re doing all this work so that we can put them into a really cool place, so it’s worth spending some time to set this up. We’ll have to combine a few elements to make this background. First, we’ll need a road that has the correct perspective to it. Since we’ll be including our subject’s feet, this part is really important. Then, we’ll need a city skyline for the background. Throw in some dramatic clouds (I love clouds, if you haven’t realized) and you’re good to go.Step 1
Open the photo of the road. The first thing we’ll need to do is extend the canvas, since we’ll be adding some buildings and sky to it. You’ll see later that this is sort of a ballpark size for now. It gives us some room to work with, but you can always crop it later if you’d like, depending on the end result. Go to Image > Canvas Size, and in the dialog, make sure the Relative checkbox is turned off, then change the Width and Height unit pop-up menus to Pixels. Let’s keep the Width the same, but increase the Height to 4200. Also, go to the Anchor grid, at the bottom of the dialog, and click the bottom-middle square to keep the road anchored at the bottom of the image and only extend the canvas toward the top. Click OK when you’re done.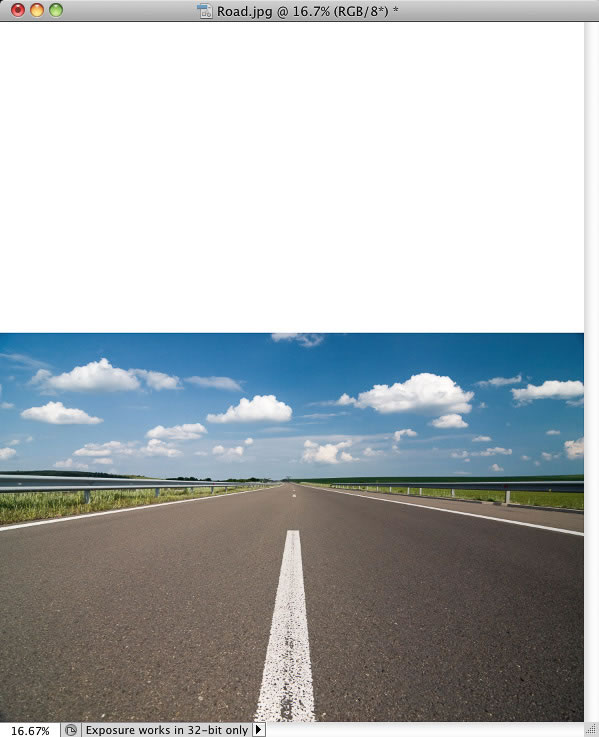 Copyright – © iStockPhoto/Petko Danov
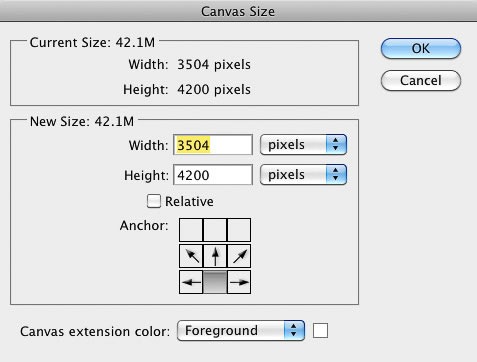
Step 2
Press W to get the Quick Selection tool. Then, brush over the sky and solid area at the top of the image to select it. Don’t worry about refining it with the Refine Edge dialog, because it’s in the background and we’ll never really see any detailed area back there.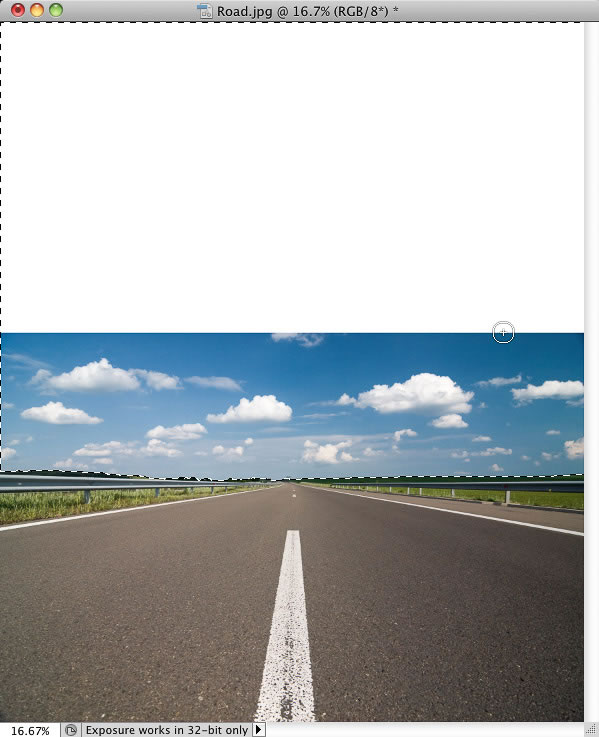
Step 3
Open the clouds photo. Go to Edit > Select All to select the entire photo, and then to Edit > Copy to copy it. Switch back over to the background image (where we already have an active selection from the last step), and go to Edit > Paste Special > Paste Into to paste the clouds into the selection. This automatically creates a layer mask, so the clouds only appear in the top of the photo.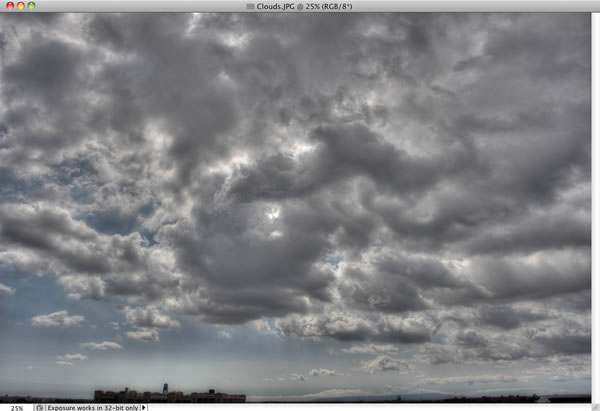
Step 4
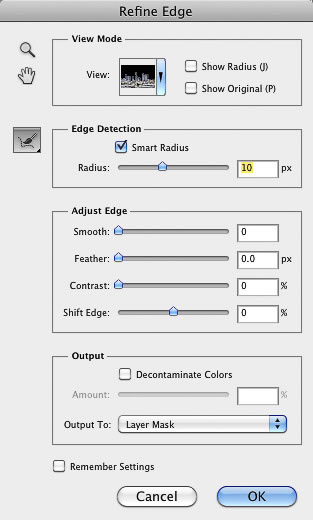
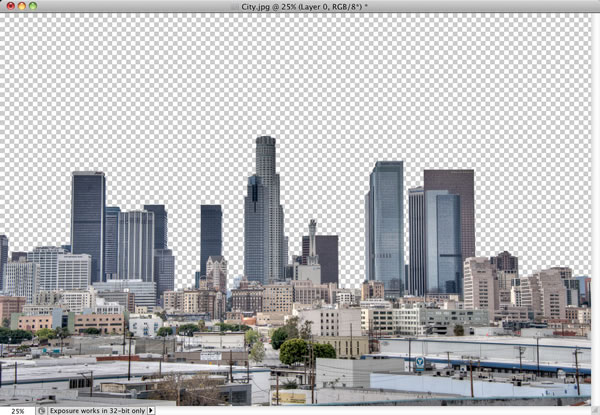
Open the photo of the city skyline. Use the Quick Selection tool to select the buildings. Make sure you zoom in and use a smaller brush to get all the tiny edges that the Quick Selection tool probably won’t pick up on the first pass. Remember, you can Option-click (PC: Alt-click) to remove anything it selected that you didn’t want selected. Then, click the Refine Edge button up top in the Options Bar. Since there are lots of tiny little details around the edges of the buildings that we’ll want to select, turn on the Smart Radius checkbox, so that Photoshop will look outside of the selected edge for them. Then, set the Radius to 10 pixels, set the Output To setting to Layer Mask, and click OK.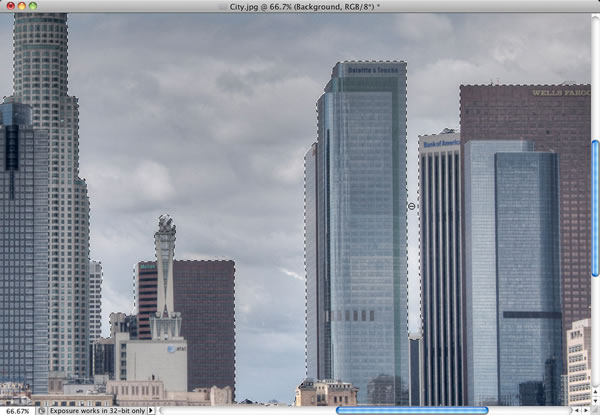

Step 5
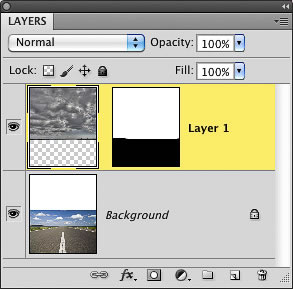
To copy the city photo, we have to use a different command because it has a layer mask with it. So, go to Select > All to select everything, then Edit > Copy Merged to copy the photo. This copies exactly what you see onscreen with the transparent sky. Go back to the background image and Command-click (PC: Ctrl-click) on the layer mask of the clouds layer to put a selection around the sky once again. Then go to Edit > Paste Special > Paste Into to paste the city skyline into our background image. Use the Move tool (V) to move it into place. Because the Paste Into command automatically created a layer mask, you don’t have to worry about moving it over the road. It’ll automatically stay hidden from the bottom of the photo.Tip: Reselecting the Same Area. If you want to reselect the same area you previously had selected, go to Select > Reselect and Photoshop will automatically bring up your last selection.
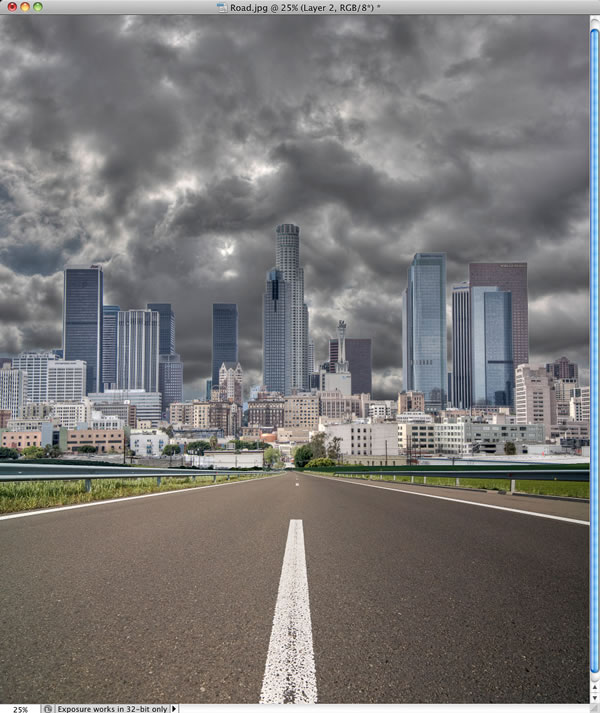
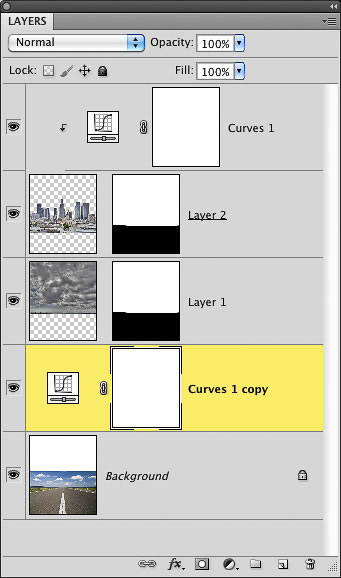
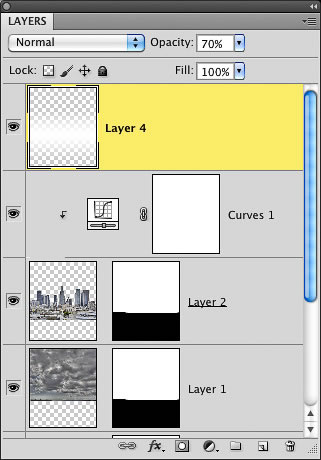
Step 6
Next, we’ll add some contrast and darken the city a little. Click on the Create New Adjustment Layer icon at the bottom of the Layers panel and choose Curves. Click in the middle of the curve and drag it downward. Then, click on the Create a Clipping Mask icon at the bottom of the Adjustments panel (it’s the third icon from the left, and looks like an Oreo cookie with the top being pulled off). While you’re at it, let’s darken the road, too. Just press-and-hold the Option (PC: Alt) key and drag the Curves adjustment layer you just created down above the road layer. Holding the Option key copies (not moves) the adjustment layer to wherever you drag it.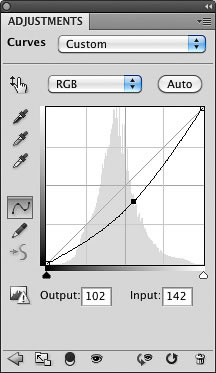
Step 7
There are some pretty bright clouds and light coming from behind the city, but we don’t see any of it, and we really want to take people’s attention off the city. Press G to select the Gradient tool from the Toolbox. Click on the down-facing arrow next to the gradient thumbnail in the Options Bar to open the Gradient Picker, and choose the second gradient from the top left, which is Foreground to Transparent (circled here). Immediately to the right of the Gradient Picker are the gradient type icons. Click on the Reflected icon (the second from the right), then set your Foreground color to white by pressing D, then X.

Step 8
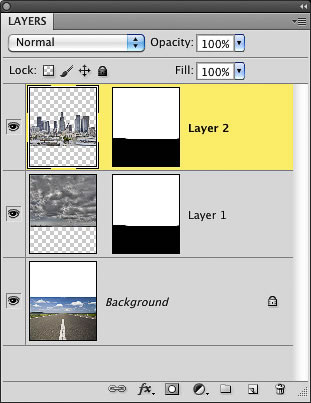
Click on the Create a New Layer icon at the bottom of the Layers panel to create a new blank layer. Then, position your cursor in the middle of the buildings and click-and-drag downward to the bottom to add the gradient on this layer. It creates a white gradient in the middle, and the gradient appears to fall off as it gets further away from the middle. This gives the appearance of adding a lot of light to the background. If it’s too bright, then reduce the Opacity of the layer to around 70%. It’s a bright light wash like this that lets us “sell” the composite more easily and keep the focus on the subject that we’ll eventually be adding. When you’re done, go to File > Save and save this as a PSD file.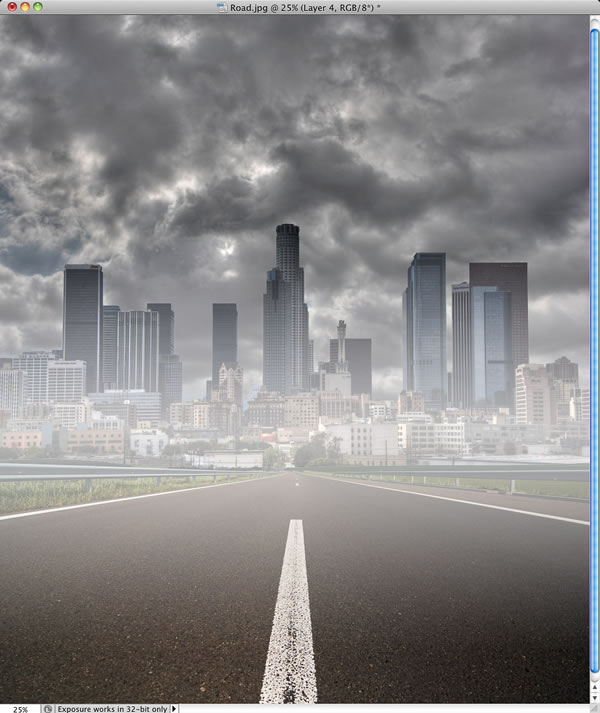
The Portrait Setup and Extraction
If you’re shooting this type of photo with processing it in Photoshop in mind, one of the best things you can do is give yourself a lot of options. Get multiple poses and multiple angles, so you have more options in Photoshop later. Set up one pose and fire off two photos. Then, have the model move and fire two more off. Then, change your angle and get down lower. Don’t overshoot the same pose. Constantly move and constantly have the model move. That way, when you’re done, you have lots of photos to work with and lots of options for compositing, depending on the background you choose.Step 9
Here’s a photo of the studio setup for this example. You can see the two strip lights with grids on the sides. Directly in front of him is a beauty dish with a diffuser on it. This gives us that nice edge light, which is not only great for adding some mood to the photo, but also helps us extract the photo from the background a lot faster.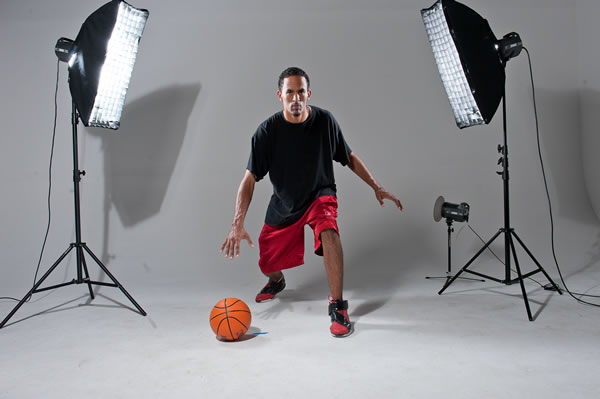
Step 10
Just so you know, I’ll typically take at least 100 photos during a shoot like this. Sometimes I know exactly what I’m looking for, and I’ll start with a certain pose. Sometimes I don’t, so I’ll take a bunch of different poses from different angles. In this example, I kinda knew the general pose I wanted. It was a low camera angle with him either bouncing the ball or slamming it on the ground. However, I wasn’t sure what background I was using yet, so I made sure to take a few different angles of the same photo. Some were close up at a wide-angle focal length, and some were pulled back a bit for a more normal view. You can see a few of them here in my Lightroom window.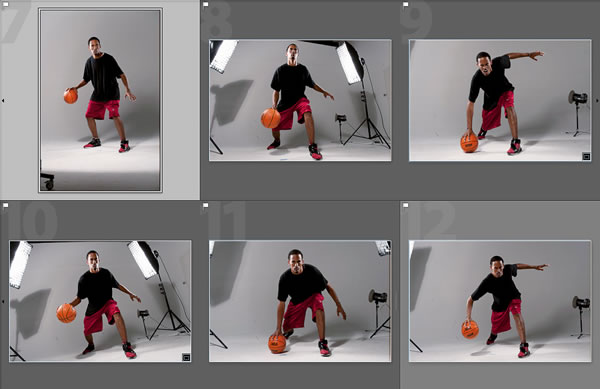
Step 11
Go ahead and open the photo we’ll be working with. As you can see here, I opted for the wider-angle close-up photo of the basketball player. The photo will open in the Camera Raw window. Right off the bat, I can tell it’s a little warm, but I’m not going to make any adjustments yet. We’ll want to make sure we give ourselves a way back and forth to Camera Raw, so press-and-hold the Shift key and click the Open Object button at the bottom right of the dialog to open the photo as a Smart Object. This way, when we see the photo in the final composite, we can always double-click on its thumbnail to come back to Camera Raw and make adjustments.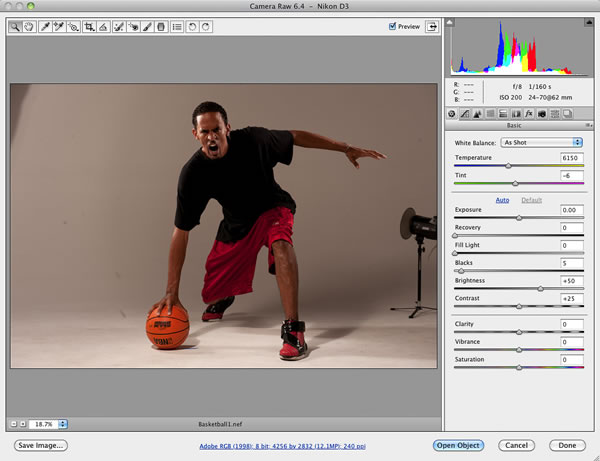
Step 12
Press W to get the Quick Selection tool, and start painting a selection on the basketball player. And, because I’ve said it so many times before, I won’t even mention here that you should zoom in and use a smaller brush to make sure you get all the details around him (oops, I said it, didn’t I?). Anyway, since he’s wearing such dark clothes that contrast with the background, the Quick Selection tool should make a good selection pretty easily here. Once you’ve got the general outline, zoom in to the feet and get them as close to perfect as possible, because that’s a key area to pull off the composite and make it look real. If you over-select an area, then press-and-hold the Option (PC: Alt) key to subtract from the selection.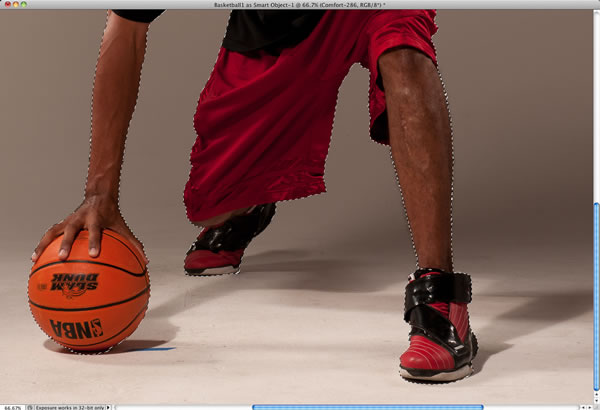
Step 13
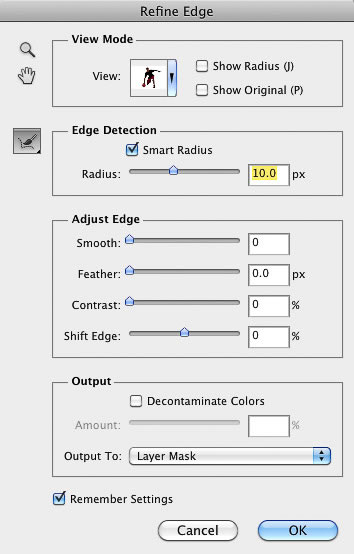
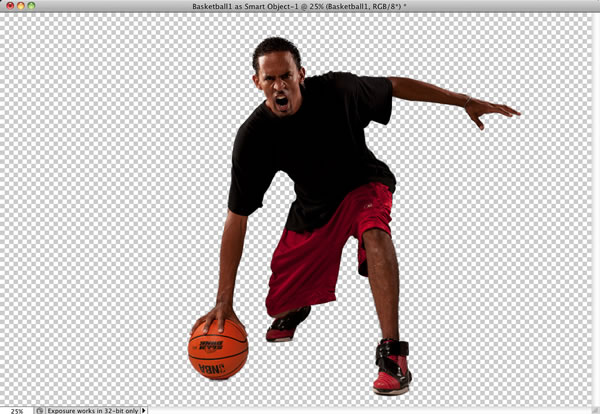
When you’re ready, click the Refine Edge button up in the Options Bar and then press the W key to change the View setting to white. Since we have hair in this one, turn on the Smart Radius checkbox and set the Radius to 10 pixels to try to pick up the edges. Now, move your cursor over the photo and brush around his hair at the top of his head, as well as along his arms and legs to get all the details. Set the Output To setting to Layer Mask, and click OK when you’re done. You’ll have one layer in the Layers panel with a layer mask attached to it. Don’t forget, if any of the edges seemed to have dropped out, you can get the Brush tool (B), set the Mode in the Options Bar to Overlay, set your Foreground color to white, and paint over those edges on the layer mask to bring them back. Go to File > Save, save it as a PSD, and get ready to move on to the composite.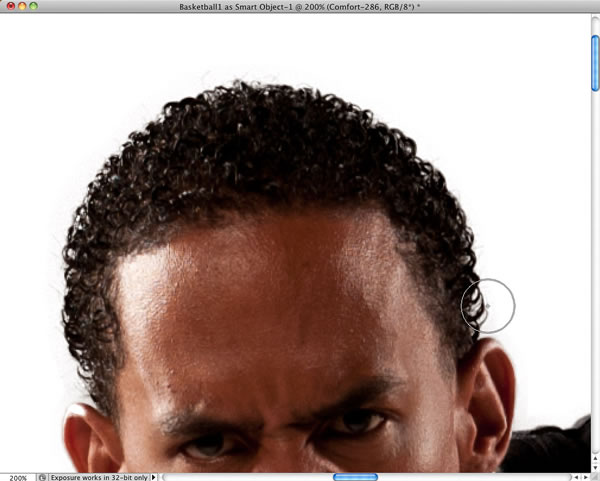
Creating the Composite
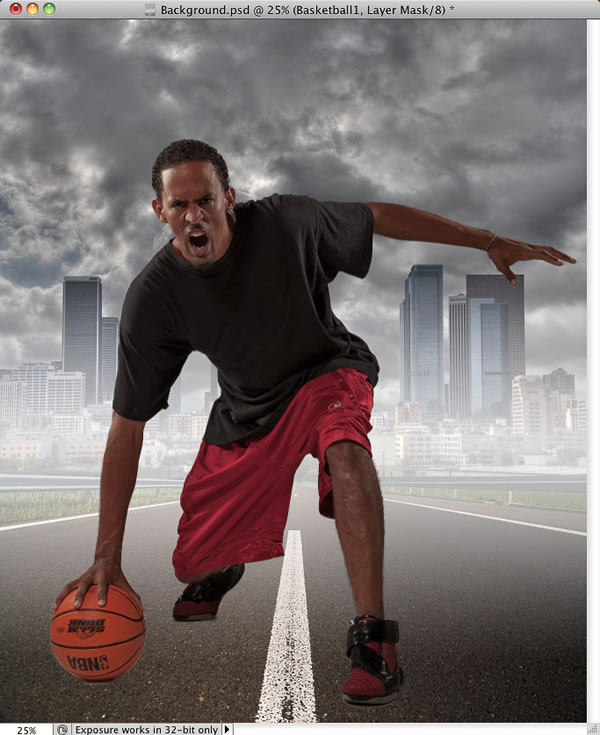
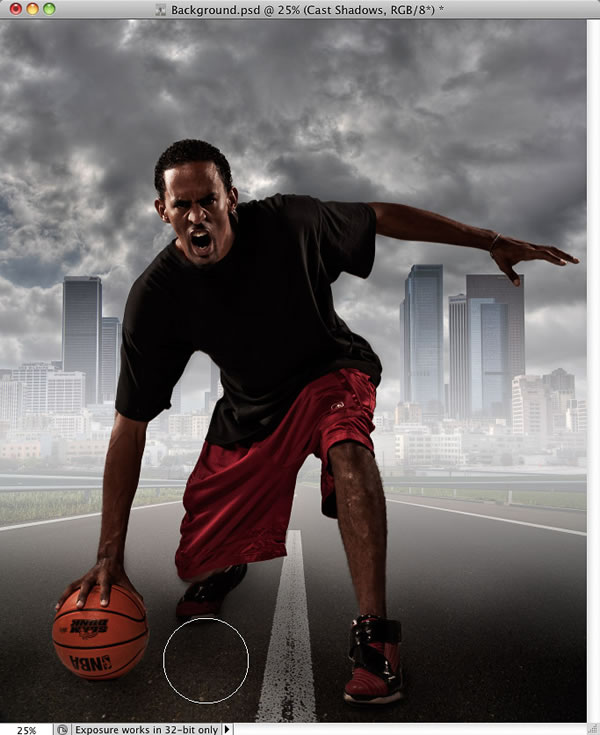
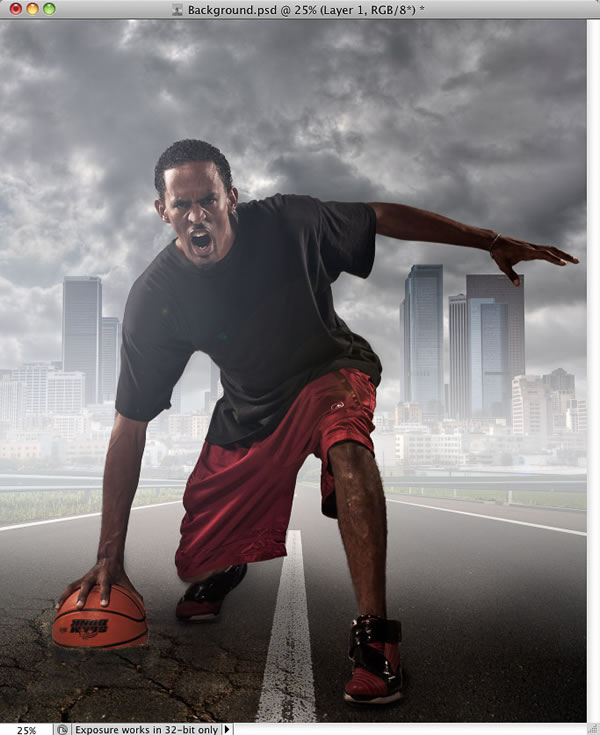
This composite was a lot of fun to create. Once the background is done and the athlete is selected, our main goal is to make him fit into the final image. Because you often need to actually put someone on to the background before you can figure out what to change, I used a Smart Object and Camera Raw to help out a lot. After that, the shadows on the ground played a huge part of pulling this one off. And perhaps the most fun part for me was the cracked concrete on the ground. It really helps to add to the intensity of the overall image.Step 14
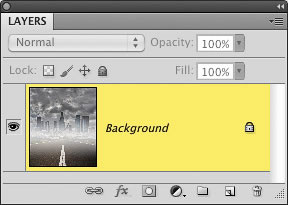
Open the background image we created earlier. If you didn’t follow along, don’t sweat it. The finished background is ready for you to download. If you did follow along, though, then go to Layer > Flatten Image to flatten all of your layers into one.
Step 15
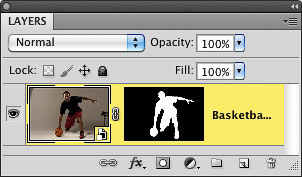
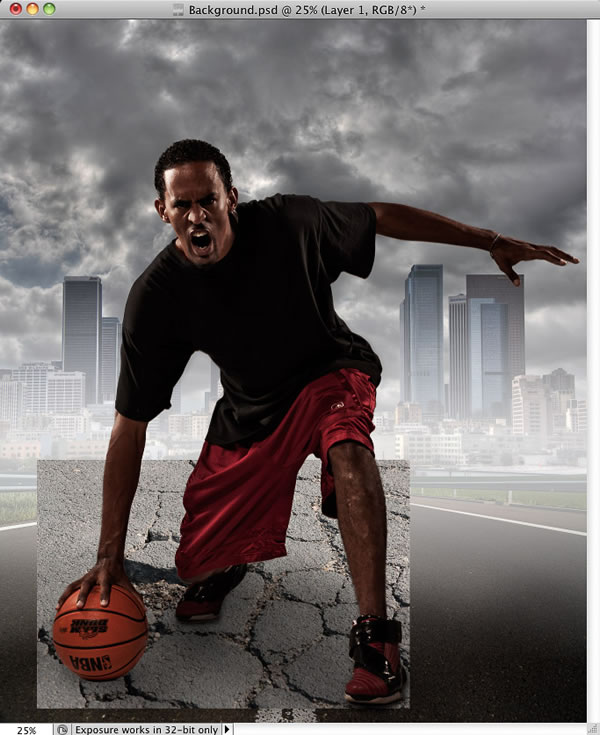
Now, open the selected basketball player. Again, if you didn’t follow along, just download the image and you’ll already have the selection done for you. First, we need to move him, so press V to get the Move tool and drag him onto the background image.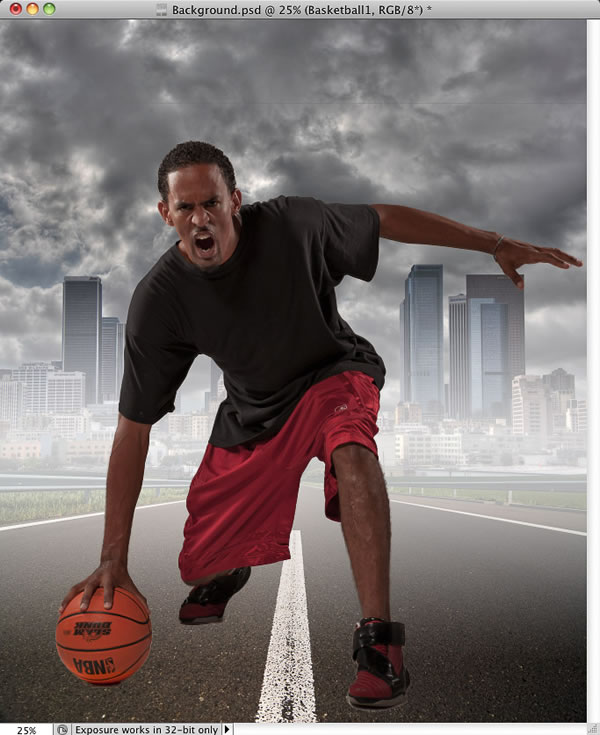
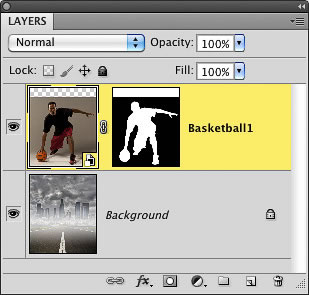
Step 16
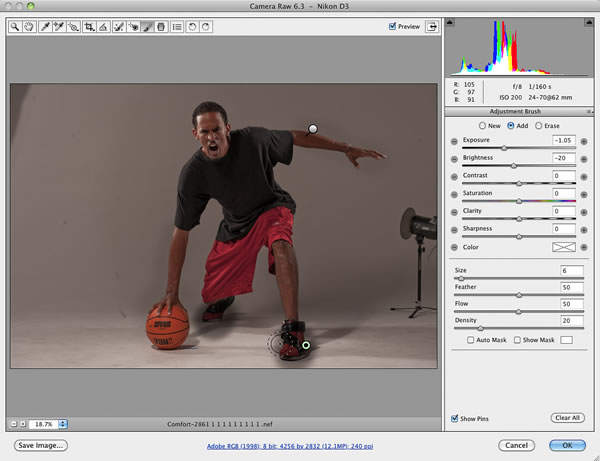
He’s a little too bright to fit into the background right now, so let’s fix that first. Double-click on his layer thumbnail to reopen the photo in Camera Raw. Reduce the Exposure to around -0.80, increase the Fill Light to 70 to bring out some details in the shadows, and reduce the Vibrance to -26 to take some of that color away from the photo. Don’t click OK yet. We still have one more change to make.
Step 17
His arms, legs, and shoes are still too bright compared to the rest of the photo. So press K to select the Adjustment Brush tool from the toolbar up top. First, set the Exposure to -0.10 and the Brightness to -5, then paint over his arms (including the ball) and his legs. Don’t worry about being precise, because we won’t see any of the spillover, since he’s already selected.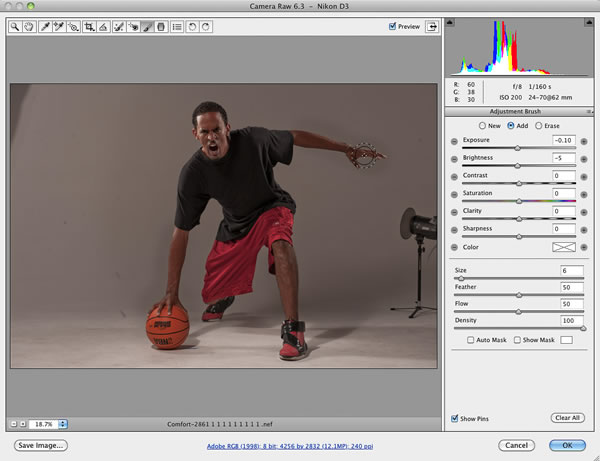
Step 18
Next, we’re going to use a trick we used in a few other tutorials to give a slightly desaturated and edgy look to the athlete. Right-click on the layer and choose New Smart Object via Copy to make a copy of the original Smart Object layer. Double-click on the new layer’s image thumbnail to reopen it in Camera Raw, go to the HSL/Grayscale panel (the fourth icon from the left, shown circled here), and turn on the Convert to Grayscale checkbox to remove all of the color.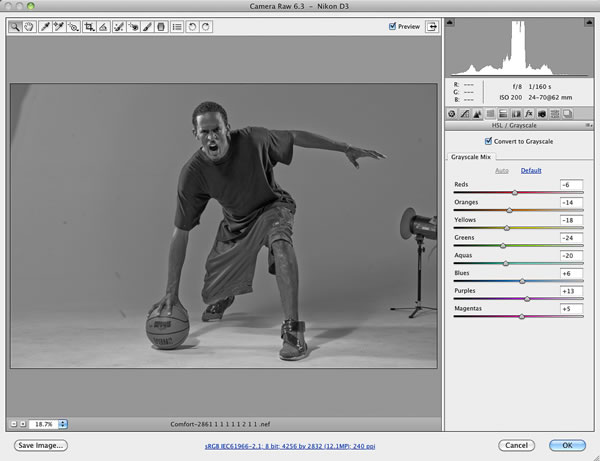
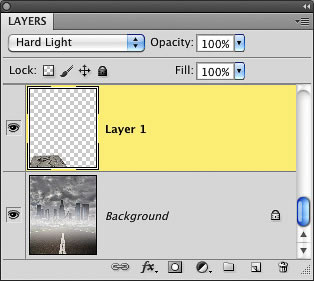
Step 19
Go back to the Basic panel and reduce the Exposure setting to -0.45. Set the Fill Light slider to 100 to really open the shadowy areas, set the Blacks to 10 to darken the blacks a little more, then set Contrast to 0, and Clarity to 35. Finally, press K again to get the Adjustment Brush and then press the Clear All button at the bottom right to remove all of the selective adjustments we created earlier. Click OK when you’re done. To complete the edgy effect, change the layer’s blend mode to Hard Light.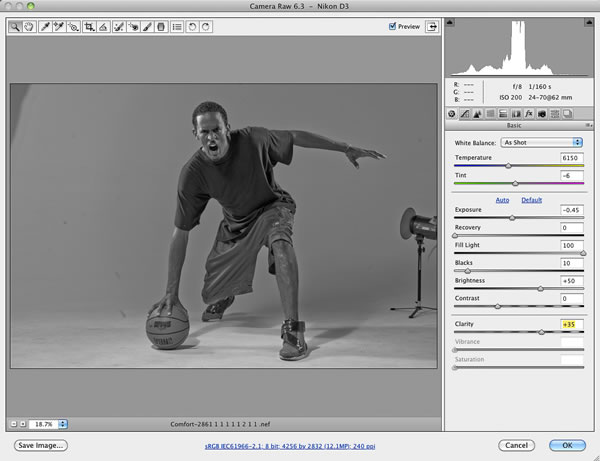
Step 20
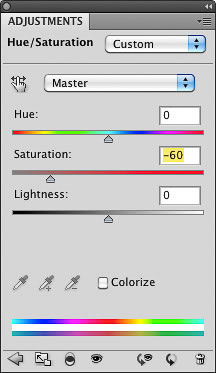
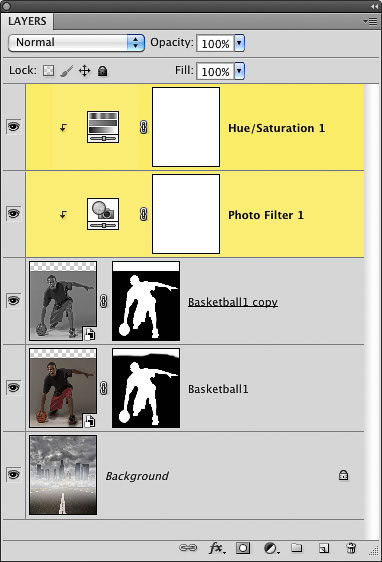
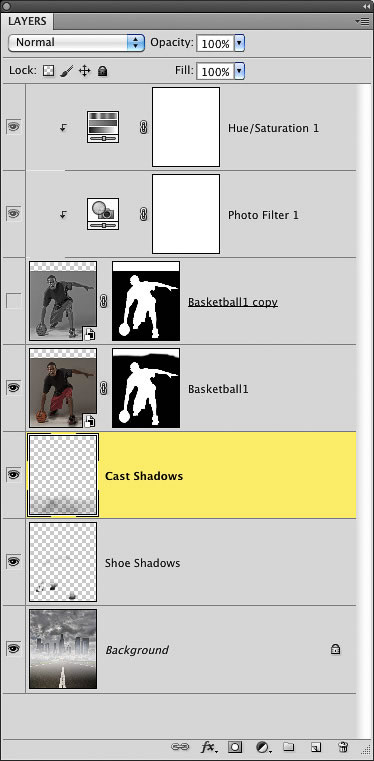
Let’s warm him up a little to add to the fiery mood that the photo is building. Click on the Create New Adjustment Layer icon at the bottom of the Layers panel and select Photo Filter. Make sure the Filter pop-up menu is set to Warming Filter (85), then click the Color radio button and increase the Density to 55%. Next, add a Hue/Saturation adjustment layer and set the Saturation to -60 to decrease it just a little more. Command-click (PC: Ctrl-click) on each adjustment layer in the Layers panel to select them both, and go to Layer > Create Clipping Mask to force each one to clip to the layer right below them.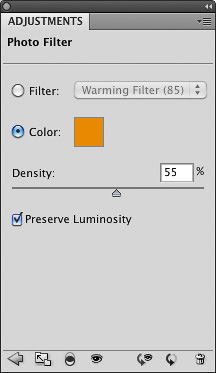

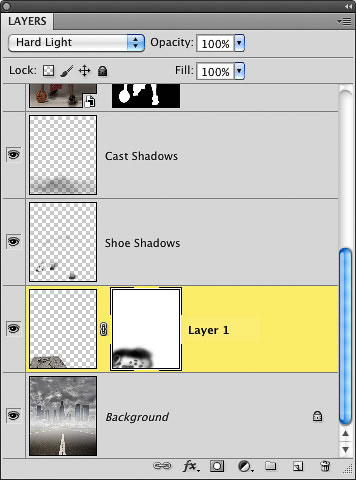
Step 21
It’s time for some shadows. Click on the Create a New Layer icon at the bottom of the Layers panel and drag the new layer below both of the basketball player layers. Press B to select the Brush tool from the Toolbox and choose a small, soft-edged brush. Make sure your Foreground color is set to black, set the Opacity to 75% up in the Options Bar, and paint a dark, hard shadow that comes out from under both of his feet and the basketball. It doesn’t have to spread too far away from the feet, though. Remember, it’s just a shadow that his shoes are casting on the ground.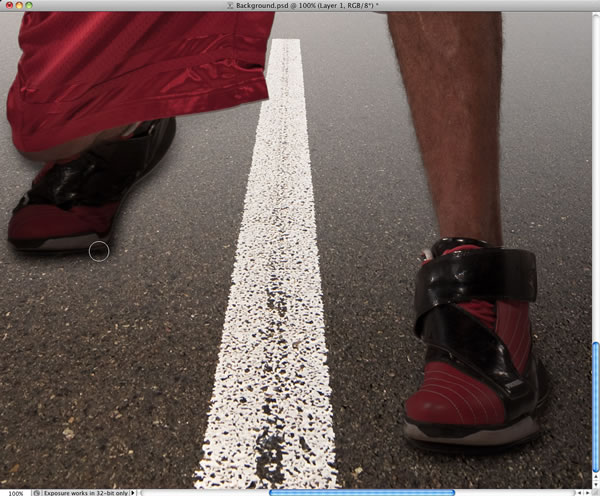
Step 22
Create another new layer on top of the last one. This time, press the Right Bracket key to make your brush larger and set the Opacity to 10%. Now, paint some more shadow areas on the ground in front of him. There’s a light source coming from behind him, so we want to make sure we’re casting some shadow on the ground in front. Since you’re painting with a 10% opacity brush, the more you paint, the darker it’ll get, and you’ll be able to build up the effect. Also, it’s a good idea to start double-clicking on the name of each layer and giving them more descriptive names at this point.Tip: Save Your File Regularly. If you haven’t already, it’s probably a good idea to go to File > Save to save the image as a PSD file in case Photoshop or your computer accidentally crashes. In fact, I press the shortcut for Save (Command-S [PC: Ctrl-S]) all the time, just to make sure I’m always covered.
Step 23
Now, it’s time for some really cool stuff. I photographed him in this pose specifically because I had the idea that I wanted to make it look like the ball was being slammed into the ground. In order to do that, we’ll need a photo of some damaged concrete. Go ahead and open the damaged concrete photo and use the Move tool to drag it into the composite. Make sure you position it directly above the Background layer, but below all of the other layers. Don’t close the concrete image yet, because we’ll need it again.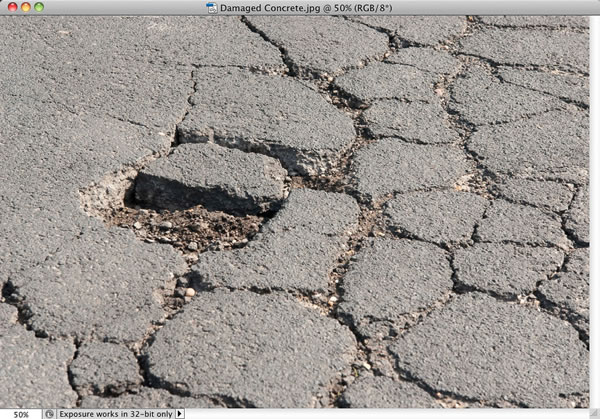 COPYRIGHT – © iStockPhoto/Michaela Fehlker
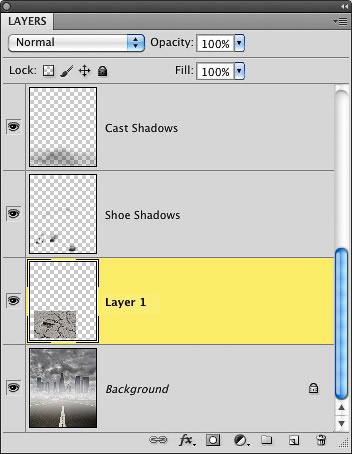
Step 24
Of course, it doesn’t fit yet, so we’ll have to transform it. Press Command-T (PC: Ctrl-T) to go into Free Transform mode. Press-and-hold the Command (PC: Ctrl) key, click on the top-left corner handle, and drag in toward the center. Then Command-click the top-right corner handle and do the same. Drag the top-middle handle down a little to make it seem like the cracks have the same perspective as the road. Also, you’ll want to position the cracks in the ground so that the hole appears as if it’s under the basketball. When you’re done, press Return (PC: Enter) to lock in the transformation.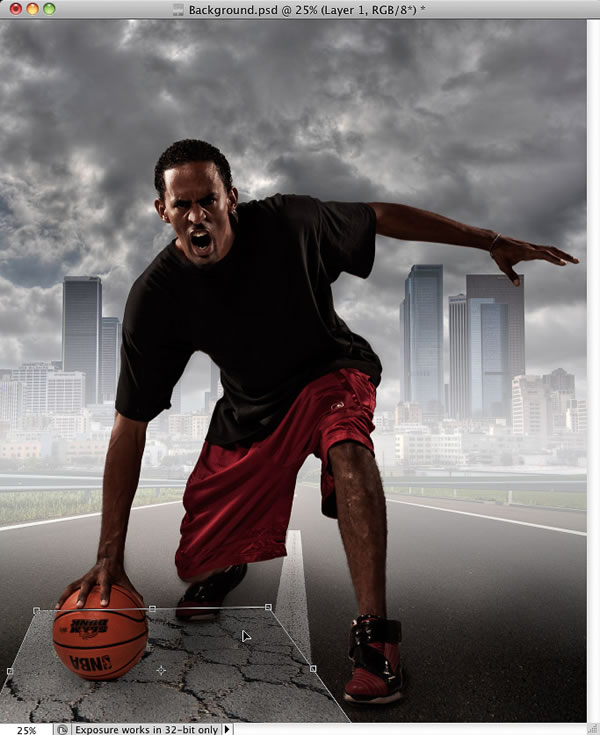
Step 25
Change the blend mode of the concrete layer to Hard Light. This fades the actual concrete portion of the layer into the original road, and just leaves the cracks. Sometimes, the Multiply blend mode works, too, and sometimes it may be Soft Light or Overlay. Depending on the color, you’ll have to experiment with which one works best.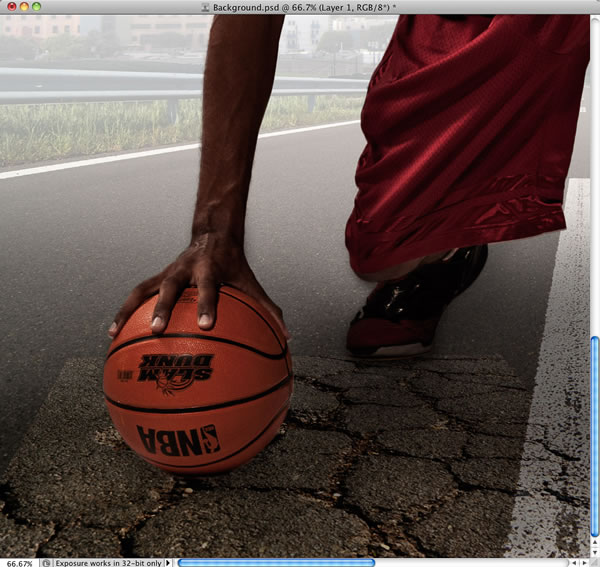
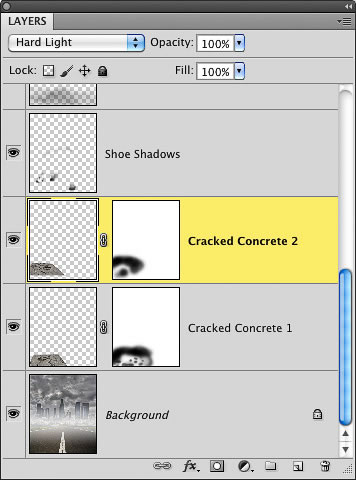
Step 26
Click on the Add Layer Mask icon at the bottom of the Layers panel to create a layer mask for this layer. Press B to get the Brush tool, make sure your Foreground color is set to black, and paint with a small, soft-edged brush set to a low Opacity to fade away the edges of the cracked concrete image, so it blends better with the road around it.
Step 27
Remember how I asked you not to close the concrete image yet? Well, go back to the original cracked concrete photo and go to Image > Image Rotation > Flip Canvas Horizontal. This way, the cracks will go out in another direction. Then, drag it into the composite and repeat Steps 11-13. Also, rename these layers, so you know which one is which.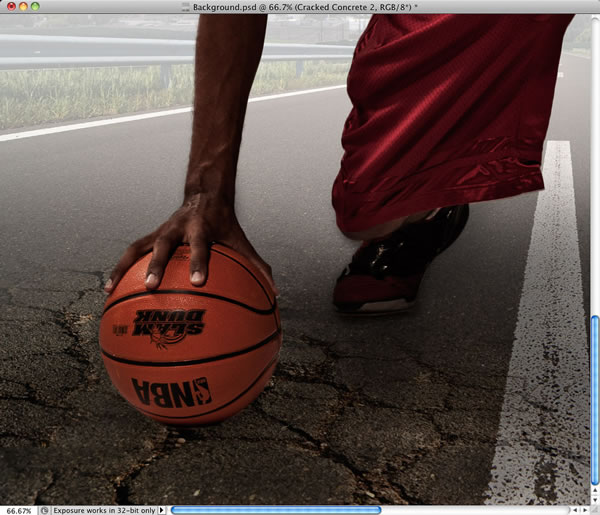
Step 28
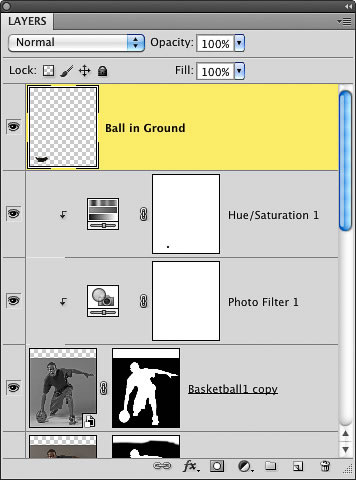
If we want the ball to look like it’s sunk into the ground, then we have to hide part of it. Create a new blank layer at the very top of the layer stack. Press S to get the Clone Stamp tool and make sure that the Sample pop-up menu is set to All Layers in the Options Bar up top. Option-click (PC: Alt-click) on an area of concrete with cracks on it to sample the texture. Then, start brushing upward with a small, hard-edged brush to cover the bottom of the basketball. You may have to Option-click a few more times as you’re painting to continue to pull in the right texture from the ground.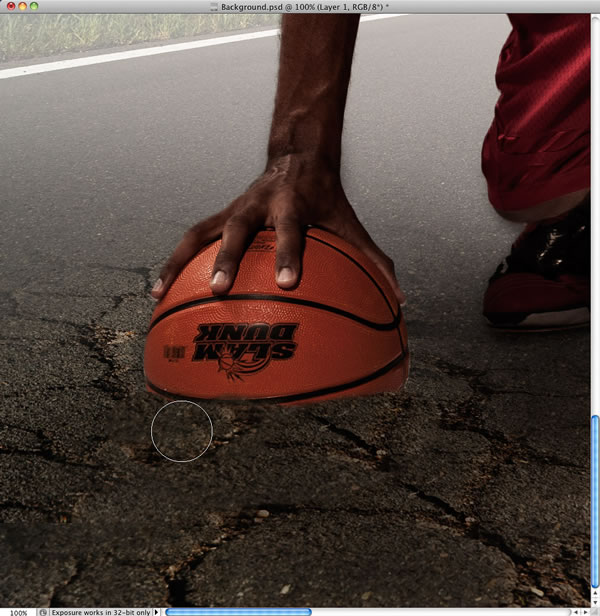
Step 29
Press O to get the Dodge tool. Up in the Options Bar, set the Range to Midtones and the Exposure to 20%, and use a small brush to paint along the very top edge of the concrete you just created to add a highlight. Then press Shift-O to get the Burn tool. Use the same settings and paint to darken the concrete, so it appears the ball is casting a slight shadow on the ground.
Step 30
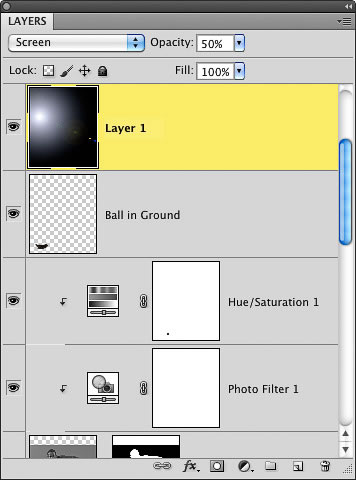
Next, we’ll add some light from behind him. As you can see, the sky is pretty bright on the middle left of the photo, so we’ll work with that. Create another new blank layer at the top of the layer stack and go to Edit > Fill. Set the Use setting to Black and click OK to fill the layer with black. Then go to Filter > Render > Lens Flare. Set the Brightness to 140%, the Lens Type to 105mm Prime, then position the lens flare on the middle left, and click OK. Change the layer’s blend mode to Screen to hide the black and reduce the Opacity setting to around 50%-60% to make the effect more subtle.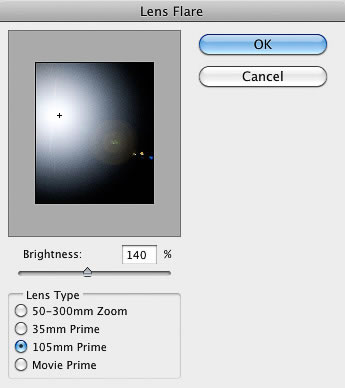
Step 31
All right, we’re almost done. Just a couple of finishing touches left. Press Command-Option-Shift-E (PC: Ctrl-Alt-Shift-E) to merge everything together into one new layer on top. Let’s add an edgy effect using the Tonal Contrast filter in Nik Color Efex Pro at its default settings. If it gets too textured in the cloud or skin areas, just add a layer mask and paint them away with a low-opacity black brush, as I did here.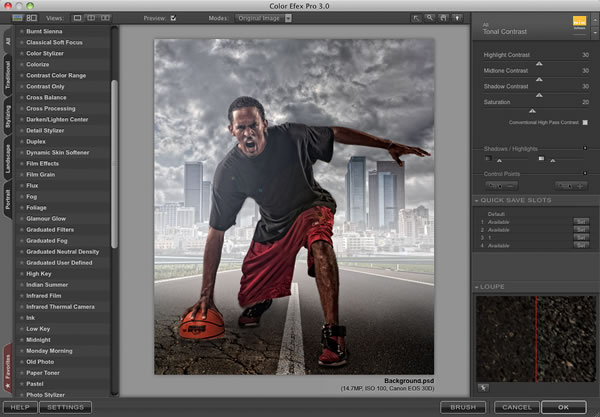

Step 32
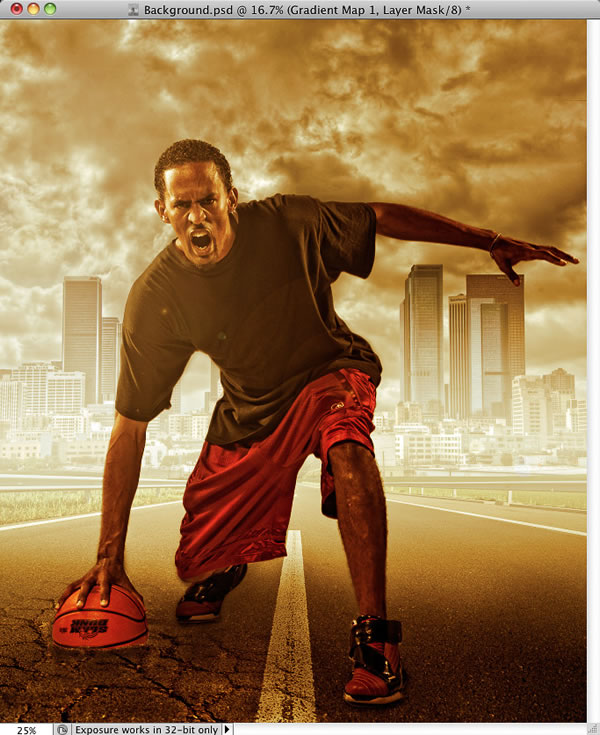
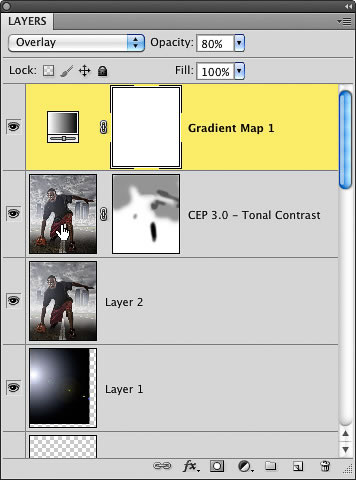
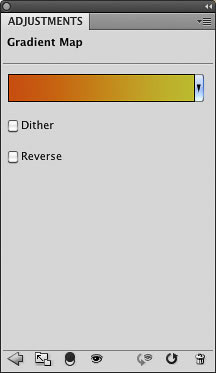
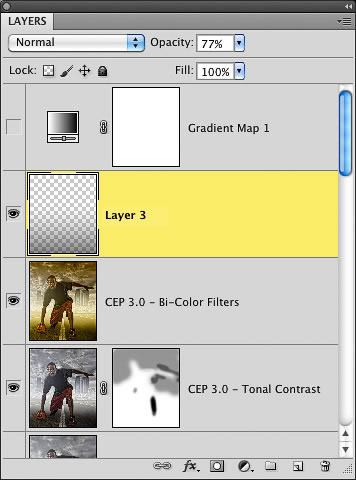
There’s one more finishing touch for this photo, though. I really want a warmer feel to it and color is a great way to add mood. And for composites, it’s a wonderful way to tie all of the random parts of the image together. One way to do this in Photoshop is to click on the Create New Adjustment Layer icon at the bottom of the Layers panel and select Gradient Map. Then, click on the gradient thumbnail in the Adjustments panel to open the Gradient Editor. To change the color of the gradient, just double-click on the little color stops (the tiny squares) under the gradient ramp in the middle of the dialog. When the Color Picker appears, choose an orange color (I used R: 176, G: 79, B: 6) for the left color stop, and a greenish-yellow (I used R: 186, G: 186, B: 53) for the right color stop. Click OK to close the Gradient Editor, then change the layer blend mode to Overlay and the Opacity to 80%. Now, it’s got a very fiery, warm color tone to it.Tip: Using Nik Color Efex Pro Instead: If you have Nik Color Efex Pro Complete, you can also use a filter called Bi-Color filter. In fact, I used it for this image and, personally, I like it a little better, because it seems to still add some nice color, but it keeps the skin tones fairly removed from the effect. Again, though, either one will work. I always make sure I give you the free Photoshop way to do it, but I’m just being honest by saying one of my secrets for compositing is Nik Color Efex Pro for finishing things off.
Step 33
So, here’s the final image with Nik’s default Bi-Color filter run on it. Lastly, one of the secrets to compositing people’s feet on the ground is to darken the entire area to keep people’s attention away from it. We’ll use a gradient for this. Create a new blank layer above all of the other and then press D to set your Foreground color to black. Press G to select the Gradient tool, click on the down-facing arrow next to the gradient thumbnail in the Options Bar to open the Gradient Picker, and choose the second gradient from the left (Foreground to Transparent). Then, drag the gradient from the bottom right of the photo to about a third of the way up, as seen here. This gradually darkens the entire area and you can always reduce the Opacity if it gets too dark.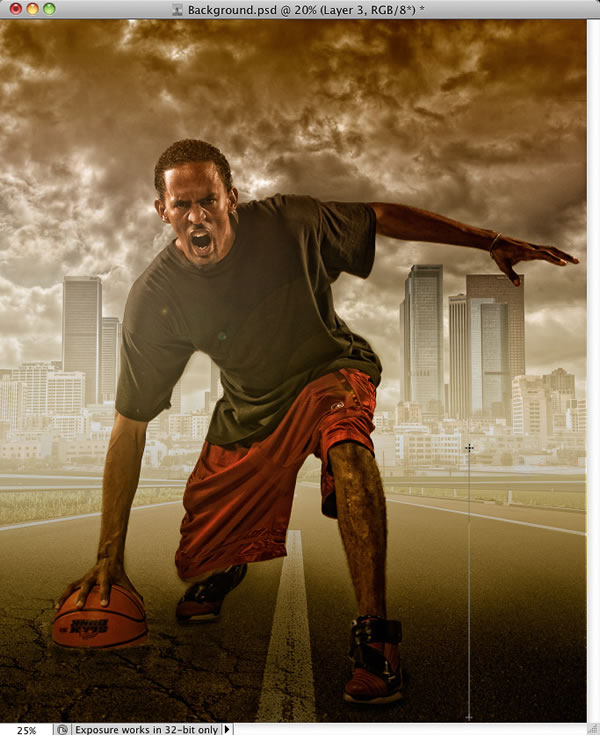
Conclusion
As you can see below, there’s room for some ad copy on the top, or maybe even the athlete’s name. Or, you can just as easily select the Crop tool and crop the image to remove some of that space up top.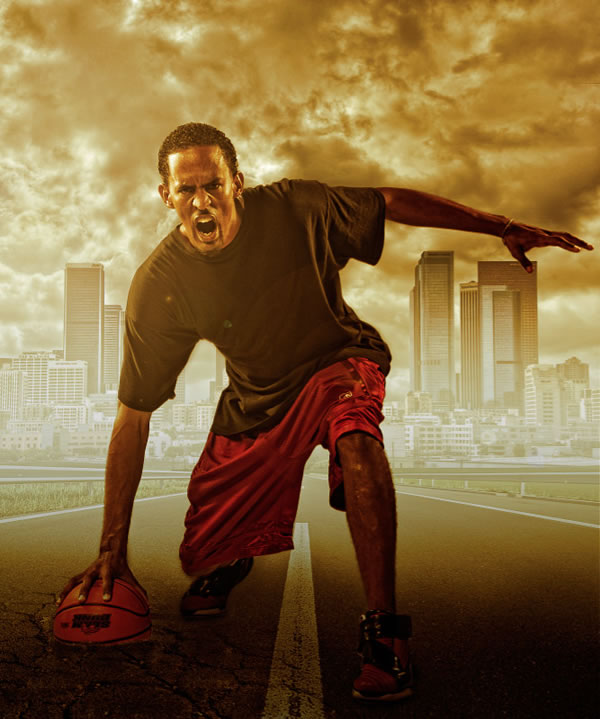 With Gradient Map
 With Bi-Color Filter
Matt’s business card says, “Photoshop Guy” because best-selling author, Photoshop instructor (for conferences, seminars, workshops, online training, DVDs, etc.), photographer, co-host of PhotoshopUser TV, blogger and podcaster for Lightroom Killer Tips (the web’s #1 Lightroom resource), Editor-in-chief of Light It Magazine, Photoshop User magazine contributor, and Education and Curriculum Developer for the National Association of Photoshop Professionals (NAPP) doesn’t fit.


0 Comments:
Post a Comment